
Hello Hackers,
In this blog post I am discussing with you about creating WiFi jammer and fake APs (Access Point) with ESP8266 (NodeMCU).
Disclaimer: This is only for educational purpose. Don’t try this on someone’s property without authorization.
What We Discuss Today
- What is ESP8266?
- Setup Environment
- Flashing : ESP8266 Turn As Weapon
- Creating WiFi Jammer and Fake AP
Getting Started
Micro-controllers are cheap, efficient and widely used by hackers. It is capable of many of the same attacks the more expensive Raspberry Pi can do. While micro-controllers don’t offer a full operating system to work with like a Raspberry Pi. Micro-controllers are more power full at the same time too dangerous. NodeMCU (ESP8266 12E) is using for this attacks.
What is ESP8266?
NodeMCU is a firmware for ESP8266 developed using C Programming Language, Espressif NON-OS SDK and Lua scripting language. It is available on market starting in India at Rs.250 to under Rs. 500. It is a low-cost micro-controller with excellent capabilities. ESP8266 WiFi module’s range is 4 to 70 meters. We can increase the range by adding one more ESP8266 which turn as WiFi extender. I will upload tutorial for ESP8266 WiFi extender next time.
Feactures of ESP8266:
- Open-source
- Interactive
- Programmable
- Low cost
- Simple
- Smart
- WI-FI enabled
Pre-requirement
- NodeMCU (esp 8266)
- USB data cable
Setup Environment
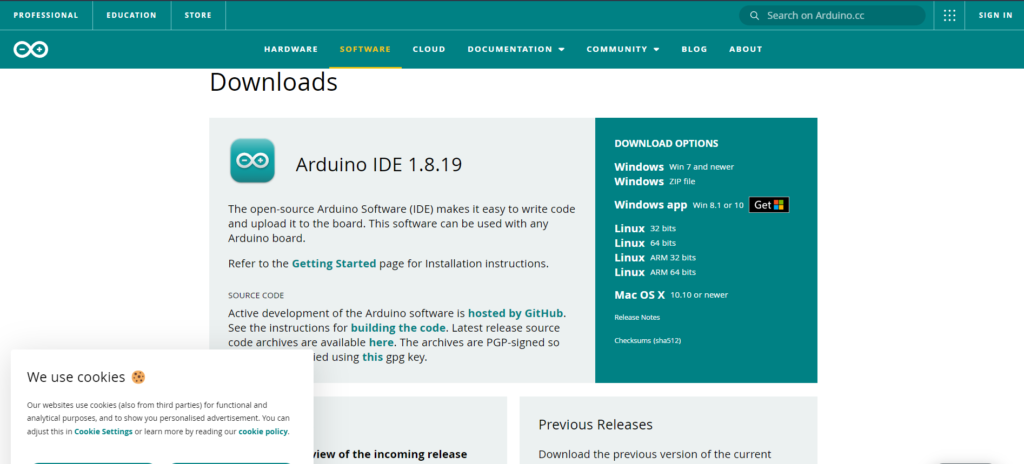
The first thing is to be needed for this project is Arduino IDE. The open-source Arduino Software (IDE) makes it easy to write code and upload it to the board. This software can be used with any boards like Arduino, NodeMCU etc… It connects to the Arduino hardware to upload programs and communicate with them.
You can download Arduino IDE on here.
After installing Arduino IDE we want to download the ESP8266 packages for IDE. So open the Arduino IDE and follow the steps.
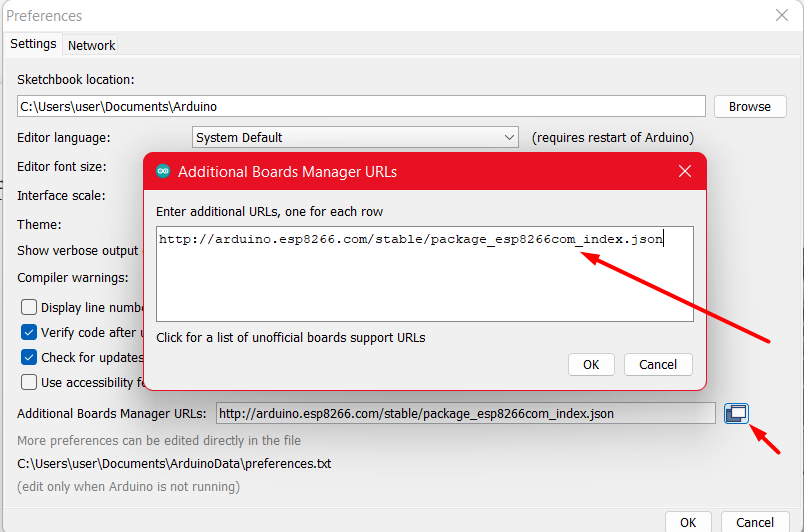
Files → Preferences
Here you can see Additional Board Manager URLs . You can see a button like this :

click that button and enter this link http://arduino.esp8266.com/stable/package_esp8266com_index.json
click OK , again OK.
Now you need to install esp8266 boards packages on Arduino IDE. For installing packages follow the steps :
first click on Tools on IDE toolbar. Then you can see option named Board : <board_name > . And click on that “Board: <board_name >”. Then select Boards Manager. Now a window pop-up and enter “esp8266” and install the package.
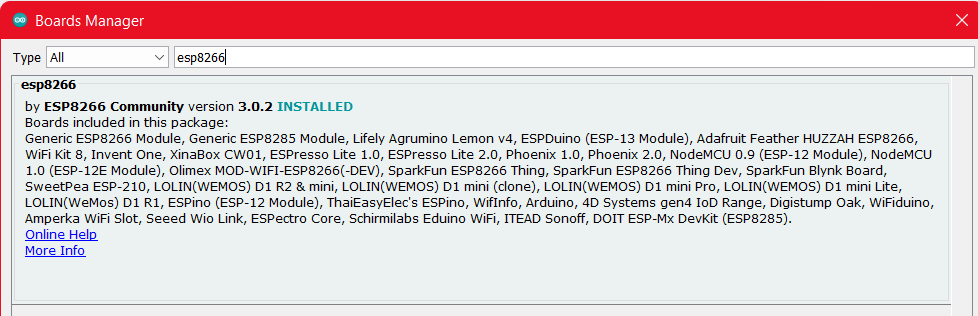
I already installed the package. You need to install this package, so click on install button.
Now finish the the first step.
Flashing : ESP8266 Turn As Weapon
Download the program which is flashing to esp9266. For download click here.
Caution: Before flashing always take a good data cable for connecting ESP8266. The use of data cable is, esp8266 need power to work and it must be connected to the system when its flashing. So take a good cable and follow steps.
After download, extract the zip and go to directory esp8266_deauther. Here we can find a file named esp8266_deauther.ino . This code is the main program.
In this step Arduino convert the program to binary and it will flash to ESP8266. Follow the steps:
Open Arduino IDE and click on File → Open → Select the file esp8266_deauther.ino
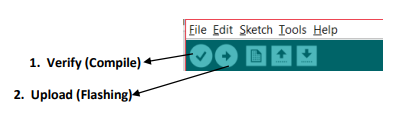
After the program load then click on Verify (1 on below figure) for compiling. After compiling done, click on Upload (2 on below figure) for flashing the program to ESP8266.
After successfully flashing the esp8266, then unplug and plug it again. Now we finish the second step.
If you already have binary file of the program, then you can directly flash ESP8266 using esp8266 flasher tool. In this case, there is no need to use Arduino IDE (above steps). For downloading esp8266 flasher tool click here.
Download and go to folder Win64 → Release → ESP8266Flasher.exe
Note: Connect the nodemcu before running the ESP8266Flasher.exe file.
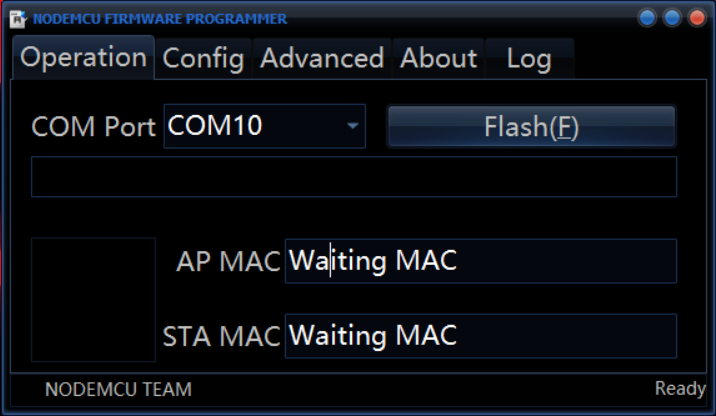
This is the interface of flasher. If you connect the nodemcu through usb cable, there will show the COM port. In this case, my COM port is COM10. Your COM port may change.
Now go to Config .

If successfully add binary file then go to Operation and click on FLASH .
Creating WiFi Jammer and Fake AP
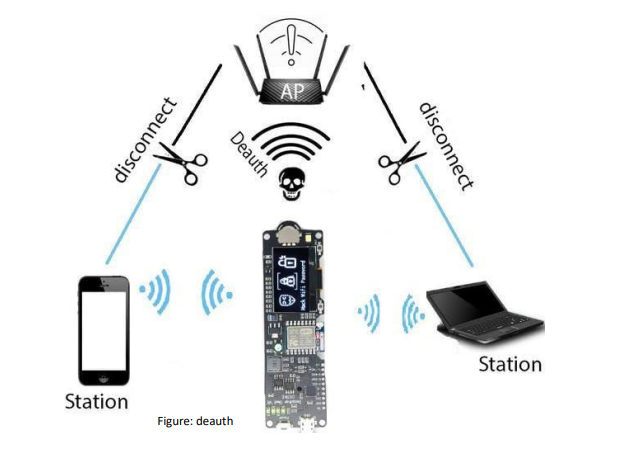
Before going to the attack we need to know what is deauth, beacon and probe.
- Deauth : A deauthentication attack is a type of attack which targets the communication between router and the device. Effectively disabling the WiFi on the device. Deauthencation attack’s use a deauthenication frame. This frame sent from a router to a device forces the device to disconnect.
- Beacon : This attack will create up to a thousand fake networks, either cloning nearby networks or creating entirely fake ones from scratch.
- Probe : The board will send probe requests asking for a network name that’s in the list you specify. This will confuse some Wi-Fi trackers and also sometimes cause Wi-Fi attack tools to create fake networks in response to the network names contained in the probe requests.
First connect to NodeMCU’s access point.
The NodeMCU WiFi’s SSID is pwned and password is deauther.
After connecting we can access the web interface on 192.168.4.1 and you can use any browser for browsing. Before going to web interface make sure that nodemcu is power on and you are connected on its AP. The interface is like below :
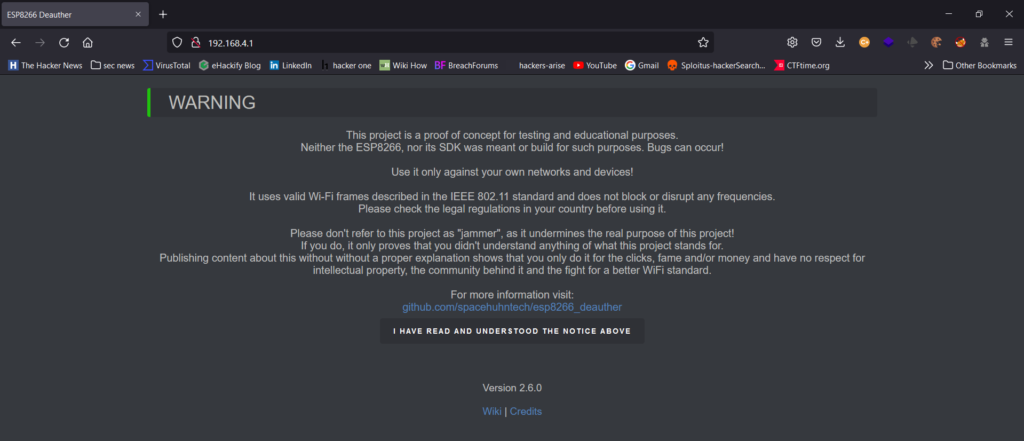
Read the message and click on I HAVE READ AND UNDERSTOOD THE NOTICE ABOVE .
This is the first page of web interface. Also read the info part too, these will give more information.
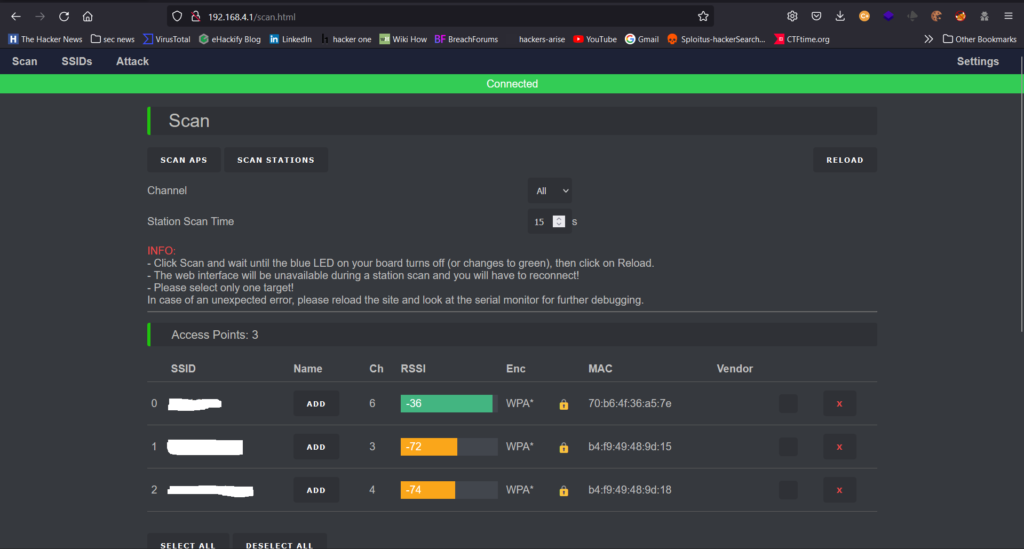
This will give you a list of every device advertising a Wi-fi network in range. We can scan APs and also scan specific stations. We can select two or more AP at same time but for better result always select one target at a time. We can select by clicking upon the rectangle box which is under the Vendor column (above figure).
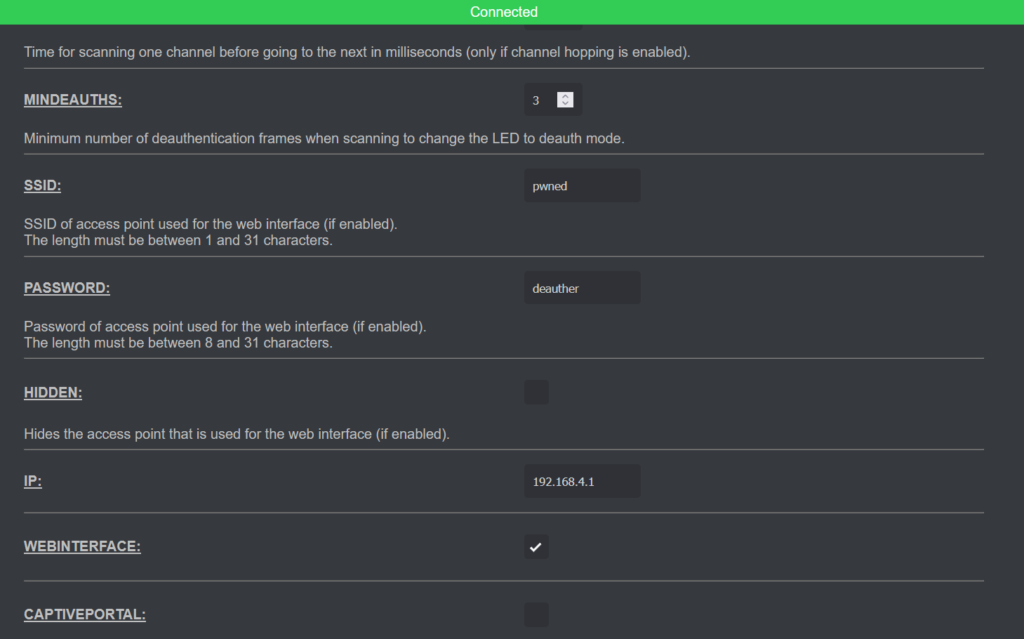
Before going to attack just explore the Settings on right top side of screen. On the above image the SSID is our WiFi AP’s name. You can change that if you need and the password also. There have other useful settings also.
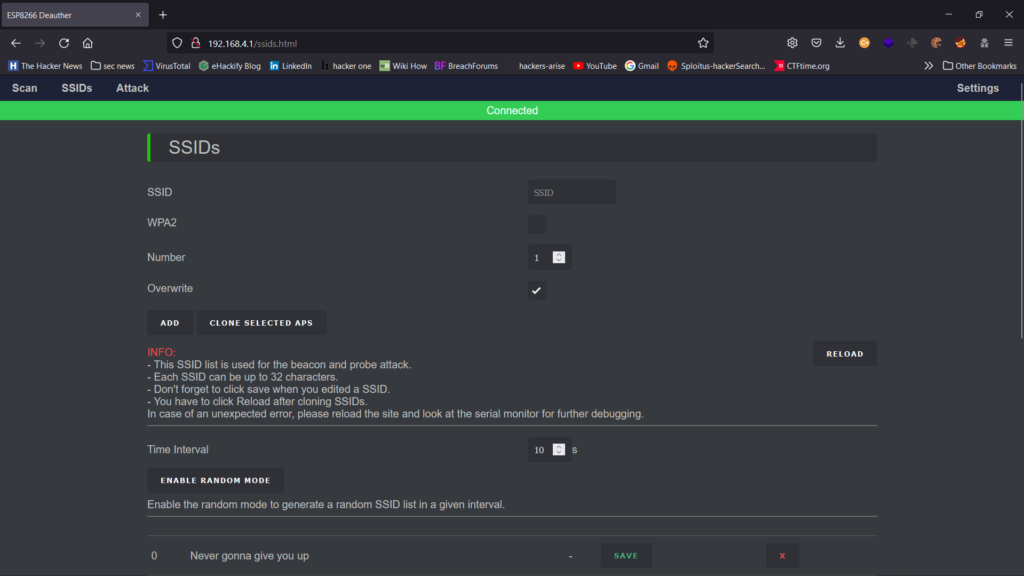
Here we can create hundreds of fake AP list. This list is use for both beacon and probe attack. We can create customized names for AP’s. We can add SSID by enter the name of AP in SSID input field. After enter SSID, click on ADD. If you select a AP, and you need to create fake AP on same as selected AP then you can click on CLONE SELECTED APs.
ENABLE RANDOM MODE is for generated a random SSID list in an interval. You can change the interval which is above on ENABLE RANDOM MODE .
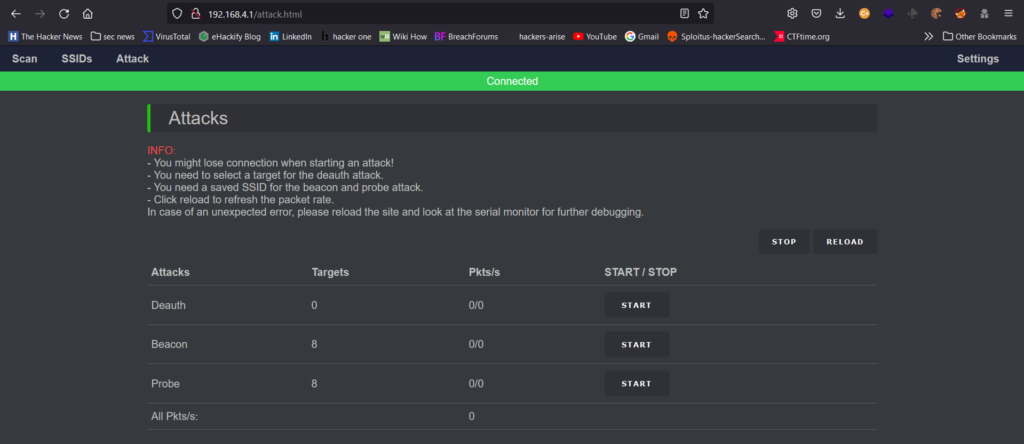
This is attack page. Read the INFO and note that you might lose connection when starting an attack and make sure that target AP was selected.
You can turn nodemcu as Wifi jammer when you use deauth mode. You can use these 3 type of attack with ESP8266.
Lets attack !!!!!
But remember you are not allowed to attack any WiFi without proper authorization. I was just explained you that how these things happen and for educational purpose.
Happy hacking !!
You can find more esp8266 projects on here.
Biginner guide to esp8266 here.
Thank you.